# 使用无线探针在第四轴上对齐方料
{% hint style="info" %}
**如果你有 3D 探针,也可以改用** [**M465**](/docs/stable/zh/gu-jian/supported-commands/mcodes/probing.md#m465-probe-axis-angle) **宏**
**本文保留仅供存档之用,整个流程已作为一个单独的脚本化步骤加入** [**M465.1**](https://carvera-community.gitbook.io/docs/stable/zh/guides/pages/637f31a23fe655a4a13d2d664bad23eedaa58ff0#m465.1-probe-4th-axis-a-axis-stock) **命令上。**
{% endhint %}
### 弄清楚你需要使用哪些数值
通过取零件的宽度(毫米),除以 2,然后再减去至少 3mm,来计算毛坯的 y 轴偏移量。\
例如,对于一个 25mm 宽的零件,你会得到 25mm/2 = 12.5;12.5 - 2 = 9.5mm,为了简化起见,我会向下取整为 9。\
今后我将把这个值称为 **{Y offset}** 并以 9mm 为例
### 设置你的原点
将 Allow4ThAxisOriginSetting.cnc 文件上传到你的机器上并选择它。[/knowledge-sharing/align-stock-to4-th-axis-with--probe/allow4thaxisoriginsetting.cnc](https://wiki.makera.com/knowledge-sharing/align-stock-to4-th-axis-with--probe/allow4thaxisoriginsetting.cnc)\
\
打开该文件后,进入手动控制选项卡并点击设置原点。将原点设为第 4 轴原点,坐标为 0,0\
\
\
\
在工具下拉菜单中切换到探针工具,并确保它已校准。确保你的机器已准备好移动,并将其保持在安全高度。\
\
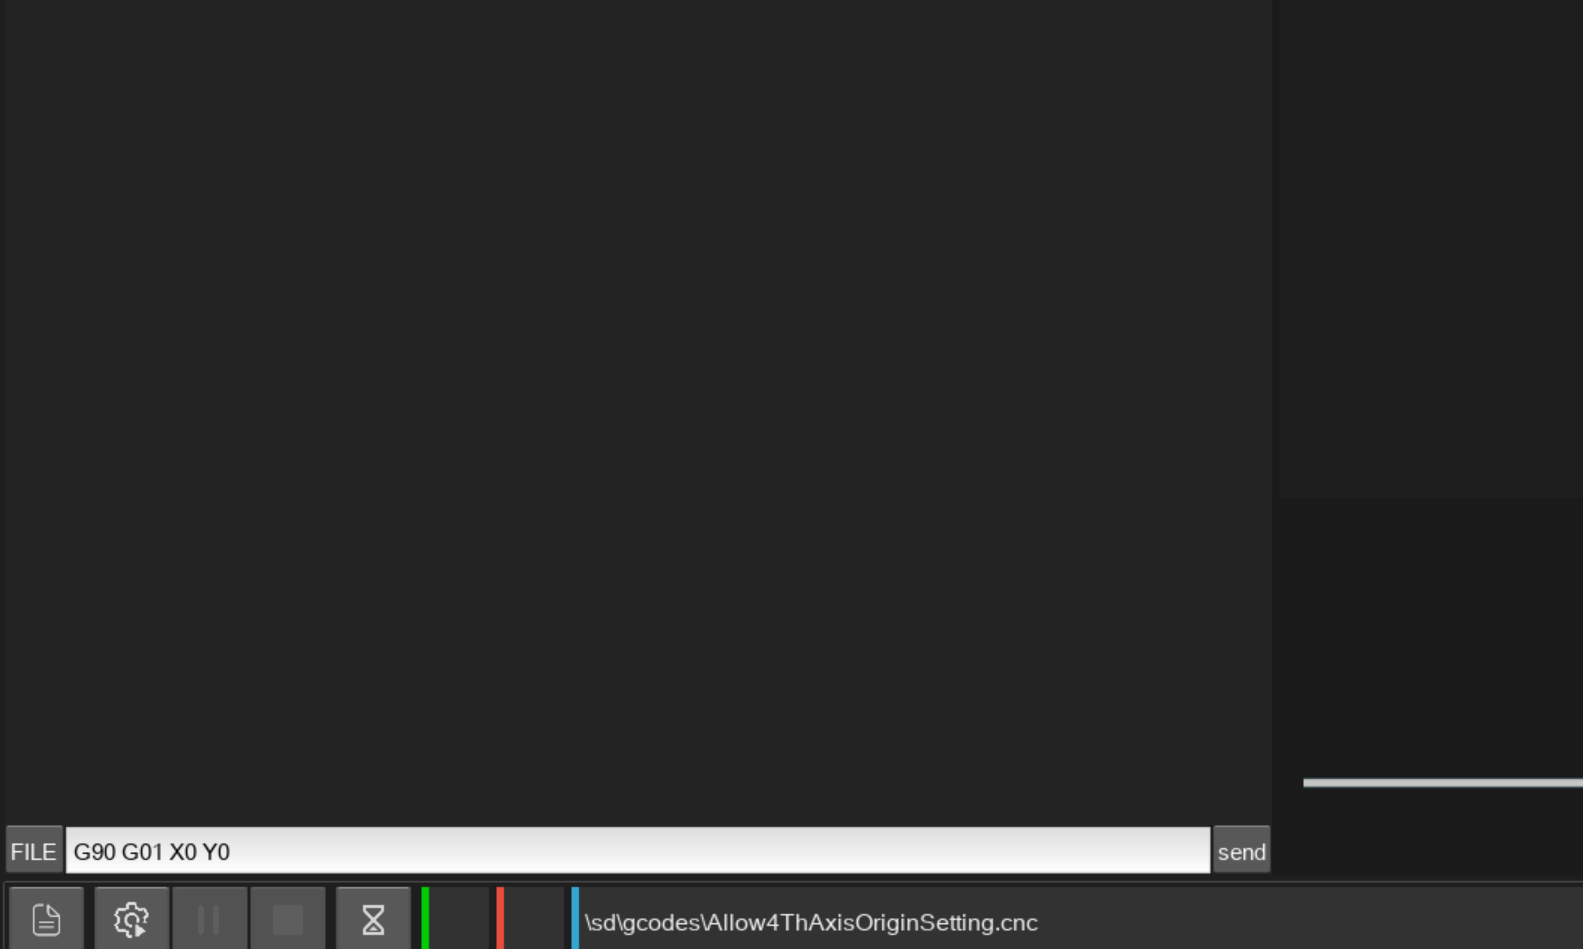
现在你要把机器对准 A 轴的中心线。为此,回到主屏幕并点击左下角写着 MDI 的按钮。这将打开一个终端。在终端中输入\
\
G90 G01 X0 Y0
\
然后点击发送按钮。这会让 Carvera 移动到第 4 轴 X 方向中心线的上方,以及 Y 方向主轴箱上方
\
\
\
\
使用手动移动选项卡,大致将 A 轴中的毛坯对齐,使顶部平面水平。然后沿 Z 和 X 移动,直到探针位于毛坯中心上方约 30mm 处,并且避开卡盘,如下图所示。探针距毛坯的确切高度并不重要。\\
### 探测命令
再次回到 MDI 中输入:\
\
G90 G01 X0 Y9\
\
然后点击发送。这会将探针移动到第一个位置。将 Y9 改为你的 **{Y offset}** 数值
G38.2 Z-150 F100 G4 P1
这将沿 z 轴探测,并在接触到毛坯时停止。在控制器中,记下当前的 Z 位置。我们将把这个值称为 **{Z1}** 并且我将使用 2mm 作为这个值\
\
G91 G0 Z10
这将沿 Z 轴向上移动,离开毛坯
G90 X0 Y-9
这会将探针移动到第二个位置。将 Y-9 改为你的 **{Y offset}** 数值,并在前面加上负号
G38.2 Z-150 F100 G4 P1
这将沿 z 轴探测,并在接触到毛坯时停止。在控制器中,记下当前的 Z 位置。我们将把这个值称为 **{Z2}**这将沿 z 轴探测,并在接触到毛坯时停止。在控制器中,记下当前的 Z 位置。对于这个示例,我将使用 1mm 作为这个值
打开科学计算器并进行以下计算。
反正切( ( **{Z1}** - **{Z2} ) / (**2\* **{Y offset}** ))
在我们的示例中,数值如下所示:
反正切( (2\*9) / (2-1) ) = 反正切(18) = 3.18 度。
### 移动 A 轴并归零
先把探针移动到一个安全位置。最简单的方法是在手动控制选项卡中使用 goto - clearance 命令。
确保 A 轴有足够空间旋转,然后在 MDI 中输入以下内容\
\
G90 A 3.18
将 3.18 替换为你计算得到的数值。这应该会使 A 轴水平。
然后输入
G10 L20 P0 A0
并点击发送以将 a 轴归零(或者使用轴下拉菜单 A = 0)\
\
Deskproto 通常会像这样以毛坯水平的方式开始,不过,如果你需要让毛坯处于不同的朝向,可以使用手动控制或\
\
G90 A {value}
在 MDI 中按你操作所需进行对齐,然后再一次将 a 轴归零。
---
# Agent Instructions: Querying This Documentation
If you need additional information that is not directly available in this page, you can query the documentation dynamically by asking a question.
Perform an HTTP GET request on the current page URL with the `ask` query parameter:
```
GET https://carvera-community.gitbook.io/docs/stable/zh/guides/aligning-square-stock-on-the-4th-axis-with-the-wireless-probe.md?ask=
```
The question should be specific, self-contained, and written in natural language.
The response will contain a direct answer to the question and relevant excerpts and sources from the documentation.
Use this mechanism when the answer is not explicitly present in the current page, you need clarification or additional context, or you want to retrieve related documentation sections.